When preparing to set up an event on the Event Management Toolbox, there are a few simple steps that will make it very easy.
- First, make sure all the officials for your event are in the Officials list on RRS.org. On the main menu, click on Toolbox, then select Officials. Search by name and if one or more of your PRO's, scorers, judges/umpires are not in the list, add them with the + Official link at that top of the page. You should include their email, first name, last name and country of their MNA. You can leave the other fields blank. Then make sure these officials sign up on RRS.org. You won't be able to give them an official role and they won't receive all automatic communnications unless they voluntarily register.
- Second, locate an electronic version of all the documents relevent to the event. You will be able to upload the documents to a common repository available to all the officials (and the Official Notice Board if you so choose), so you should have them available. Common World Sailing documents and most Class Rules are in the shared repository, so don't worry about those until later.
- Locate the logo for the event (the size of the logo doesn't matter) and have an electronic copy ready to upload.
- Then create your event.
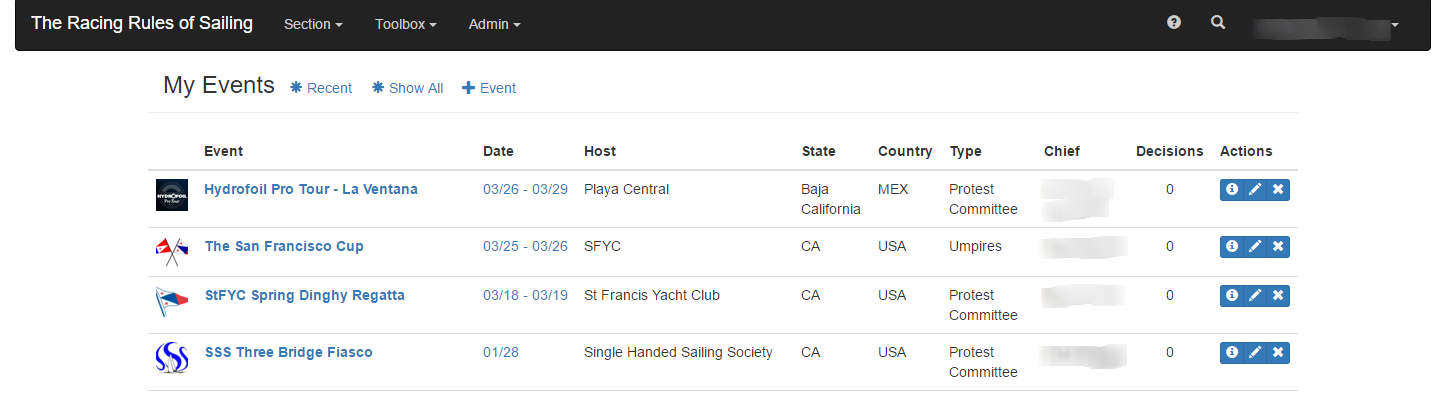
Once you have created your new event, prepare the site for your event.
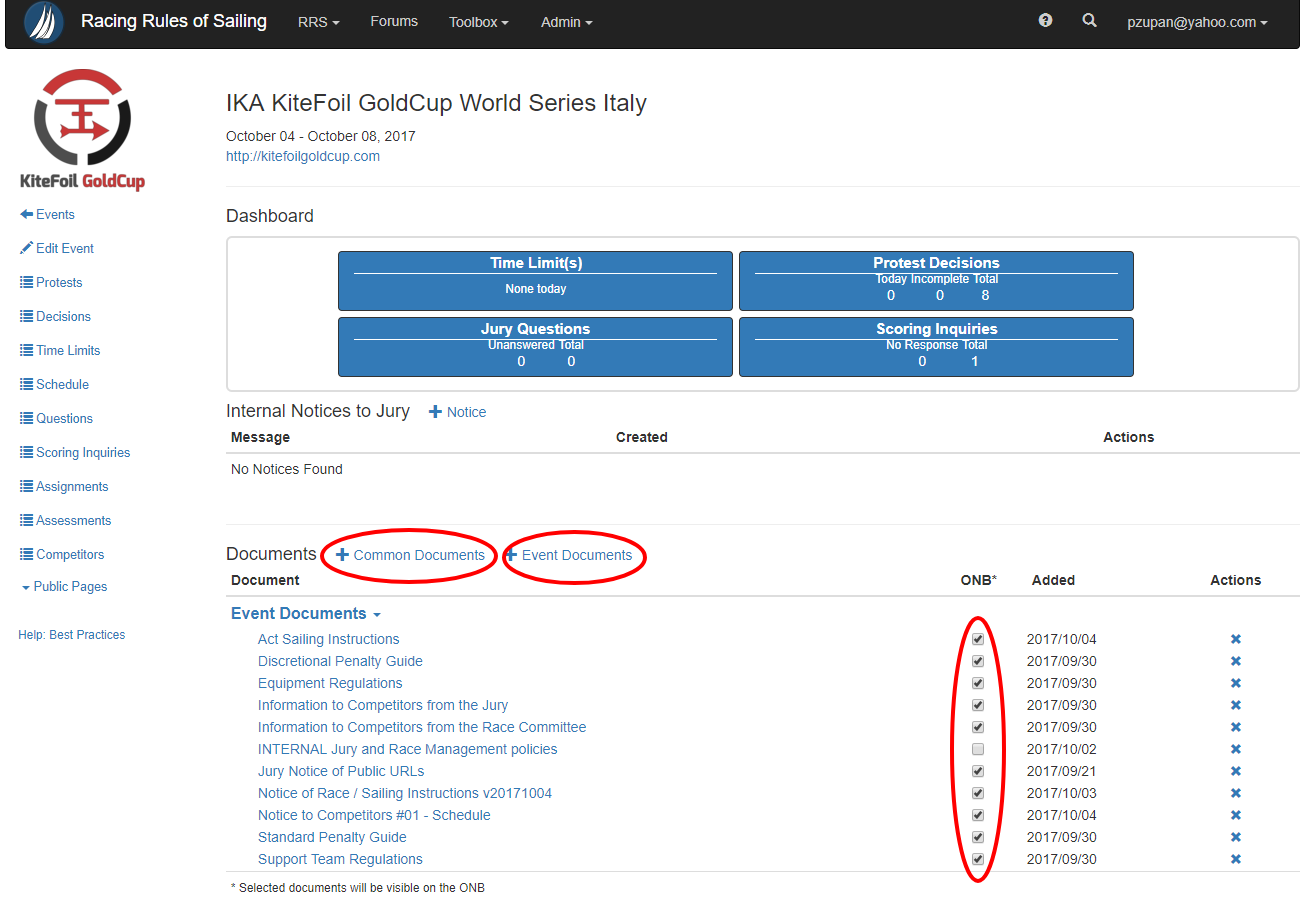
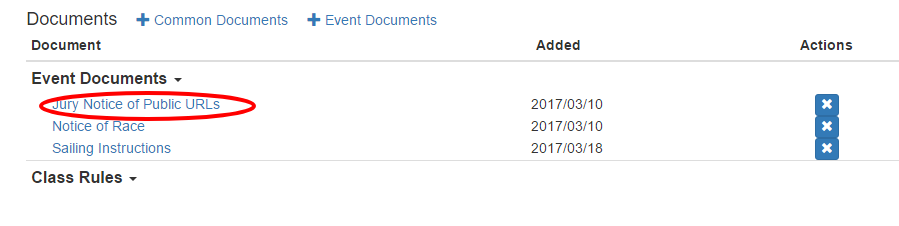
- Add your event documents to the respository. Click on the + Event Documents link and add them one at a time. These are your NOR, Sailing Instructions, any notice to competitors or other event specific documents.
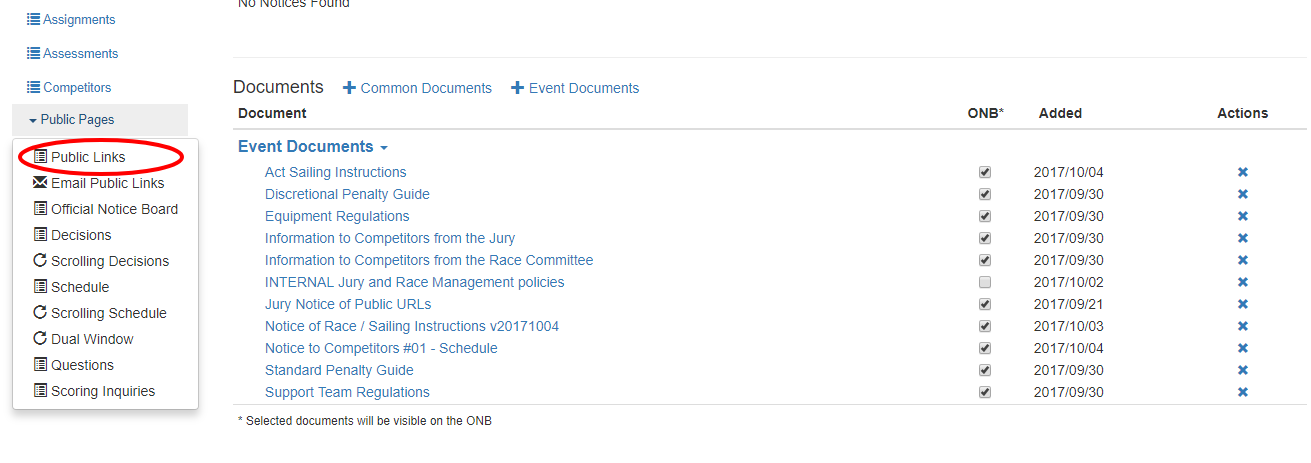
- If you have indicated that RRS.org will be the ONB, select which documents will be available on the ONB.
- Add any common documents by clicking on the + Common Documents link and searching by title. You can link Class Rules, World Sailing documents, and any other document common to your event. If you don't find a document in the list you can add them as a common documents available to all events. Typically these are Class Rules that haven't been loaded or are updated. On the main menu, click on Toolbox, then select Documents. Review the list to make sure your document is not there, then add the document by clicking on the + Document at the top. Be sure to select the proper type of document [ World Sailing, Class Rule, RRS 42, Fleet Race Umpiring ]. Then you can go back to your event panel and add that document into your common documents.
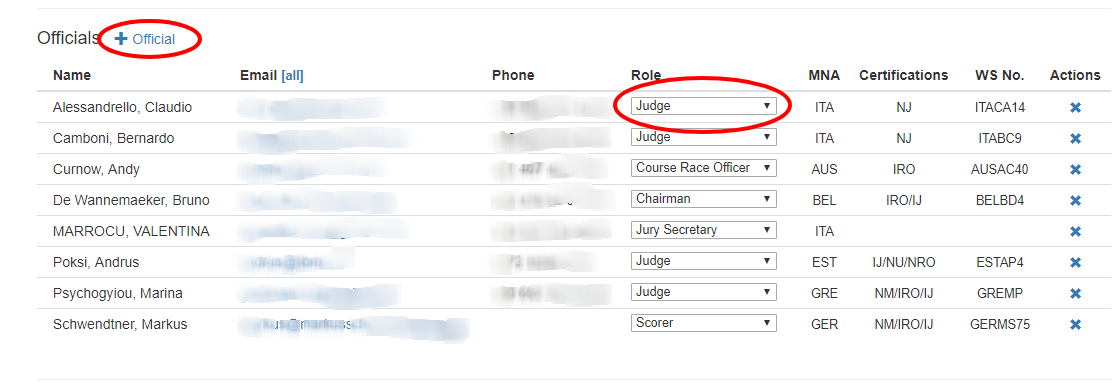
- Add all the officials who will be at your event. You can search the Officials list by either first name, last name or email.
- Select the role of the Official. Include a PRO and all scoring inquiries will be sent to that person via email and text. Add a Scorer and any scoring changes will be sent to them. Note that you will not be able to set the Role of an official who has not sign up on RRS.org. They will be automatically assigned the role of Judge until they register with RRS.org.
- Only those Officials who are added in the Event Panel will be able to see this event in their Toolbox. Additionally, this list of officials is used as the pick-list for your protest hearing panels. If they are not added here, they won't appear on the pick-list when you're publishing a decision.
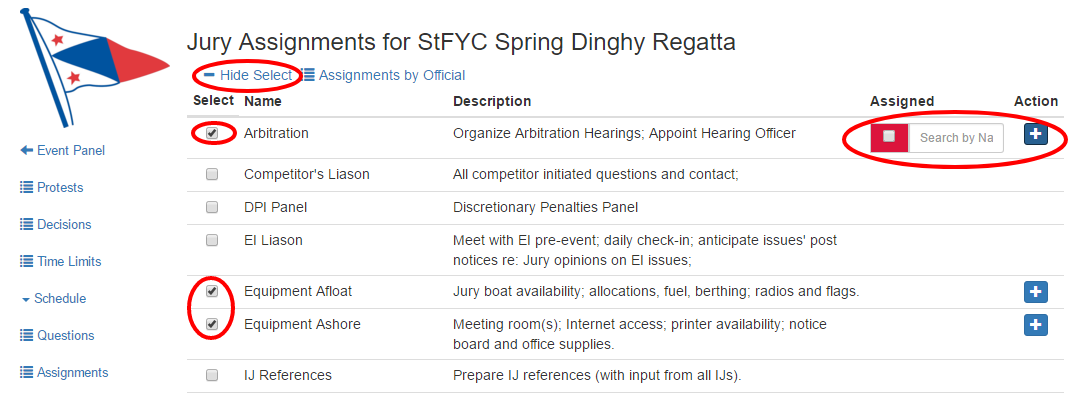
- Assign relevant tasks to jury members by clicking on the Assignments link on the left menu; then click + Select Tasks to display a list of tasks. Indicate which tasks will be assigned for your event by the checkbox on the left. When you click a checkbox, you can then assign a task to an official by clicking the + button on the right and searching by name. If you are assigning the primary responsibility, check the checkbox to the left of the search box, then search for the official to whom it will be assigned. When you have found the right official, select that official and hit return. You can also add a backup assignment the same way, except don't check the red checkbox. Make sure you indicate to your panel that the assignments are available on the event panel.
- And finally, once registration is complete, import a list of competitors by selecting Competitors on the left menu, and then Import Competitors at the top. This in many respects is the most important step. Unless the application has the email and/or phone number of the competitor, it can't communicate with them. When you import competitors, the application will give you instructions as to the format of the file you need for import. Simply ask the OA for a list in XLSX format. You will probably need to rearrange the columns to be in the proper sequence (and perhaps fix some of the data like the country code in front of telephone numbers) and then upload it. Don't worry, you can do this as many times as it takes to get it right. If the registration does not split the first and last name into seperate columns, leave an empty column for the first name and put their full name in the last name column. But make sure you follow the instructions during the import process as it expects very structured data.

The Event Panel is now ready for your event.
- Send the competitors links to the real time decisions, schedules, penalties and questions on RRS.org by sending them a message via SMS and email through the link on your Competitor's list. It is available at the top of the list after you have imported competitors.
- Post on the ONB the document entitled "Jury Notice of Public Links" that is in your Event Documents on the Event Panel. It is automatically generated (and regenerated whenever you edit the event) and available after you create the event (it is generated seperately so you may not see it immediately).
- Inform the OA of the availability of the public information on RRS.org so that they can include links on the event website if there is one. You can find the links in the Public Pages section of the left menu on your Event Panel. If they are included as an official on the event, they can see this page. If not, send them the URL for the Public Links page, or Email Public Links to them.
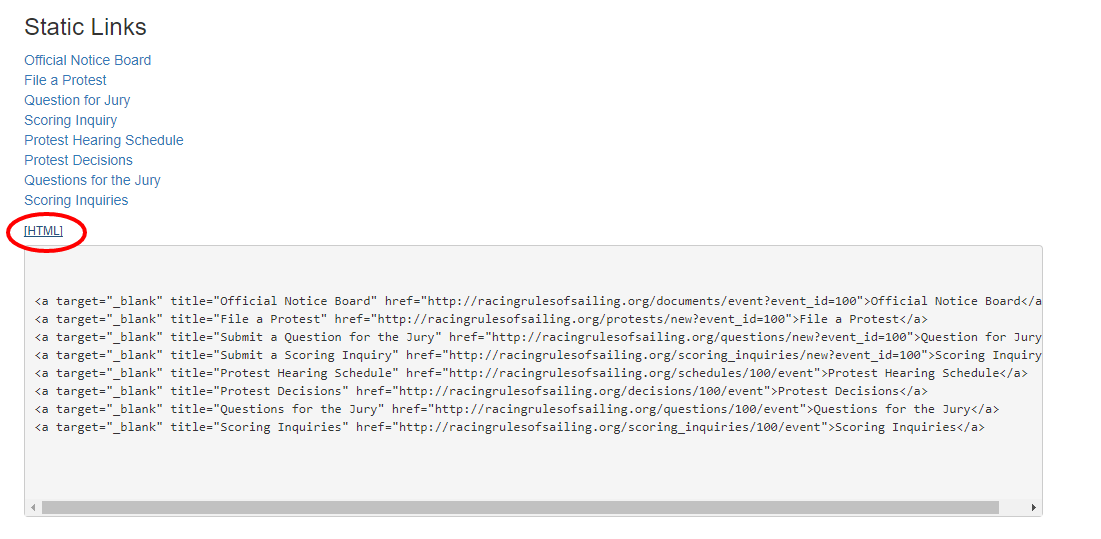
- To copy the relevant links, open the Public Links page and simply click on the relevant html button to open the source code for the link. Then copy the URL at the top and paste it into the main event website.
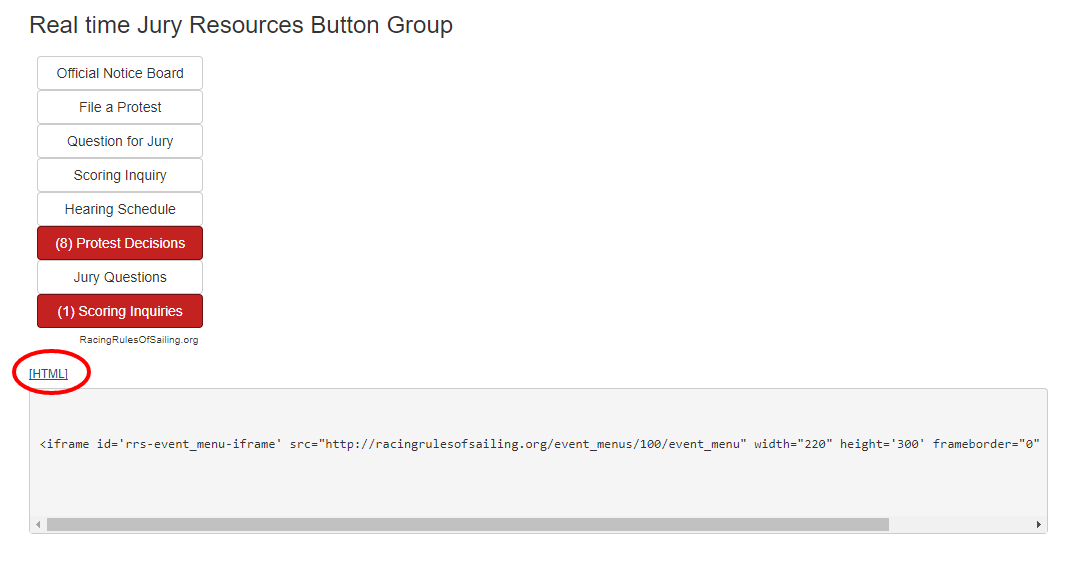
- You can also use the Real Time buttons which automatically change color and indicate new documents, hearing schedule or protest decisions. [Note: do not put these on pages that automatically refresh. The buttons subscribe to a service and don't need to be refreshed - doing so unnecessarly consumes server resources.]
- If you wish to set up a public display monitor for competitors (highly recommended), simply enter the URL for the Public Page entitled Display - Decisions or Display - Schedule [the Display - Schedule/Decisions displays both on one monitor] on the browser for the computer attached to the monitor. These public pages are automatically updated as you change the schedule and add/edit protest decisions.

During the event.
- One official should be responsible for entering the Time Limits after racing each day. Those time limits [Protest Time Limit] are displayed at the top of the public schedule pages. Each competitor [if they have an email and telephone number] is also sent an email and text message with the protest time limit for that day.
- Competitors, Race Officials and jury members can file a Protest Electronically through either the link on the RRS.org home page or the public protest decisions page. Once a protest is filed electronically, a decision template will be generated and will appear in the Decisions page.
- If a paper protest is filed, either the jury secretary or the scribe should create a New Decision. There is no reason to create an electronic version of the protest (unless you want an electronic copy of the protest avialable). Just create a new Decision and populate the protestee and protestor information from the paper form. It is a good idea to take a photo of the paper protest and attach it to the decision, but not necessary.
- Every new Decision is populated with default information if you have imported the competitor information. If it originated from an electronic protest, it will even have the protestee and protestor already populated.
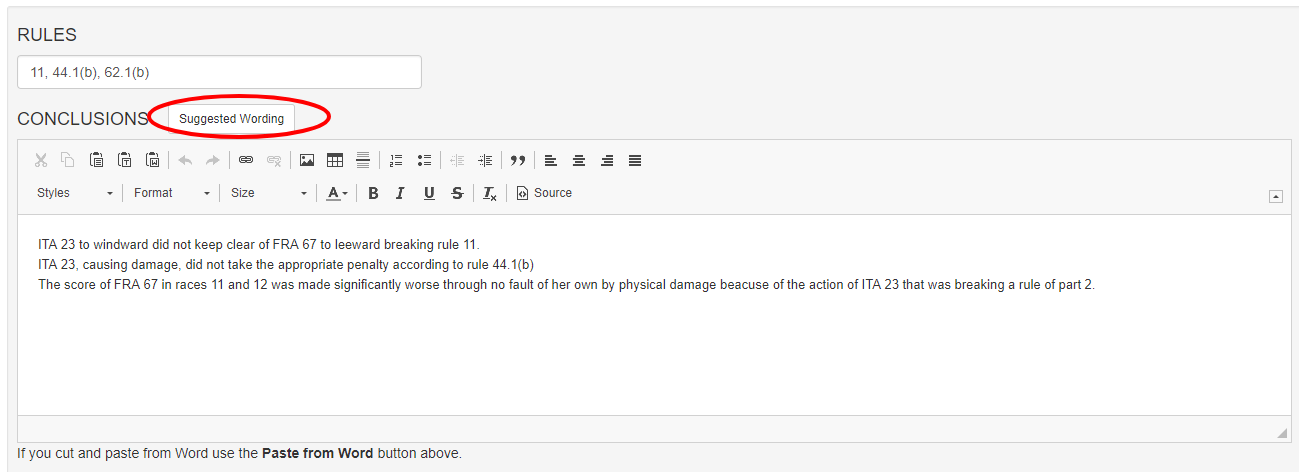
- During a hearing, the scribe should confirm the validation section, then enter facts, conclusions and decision.
- Once the facts are complete, use the Suggested Wording button to automatically populate the conclusion and decision with language appropriate for the rule.
- After entering all the protests, the jury can set the schedule on the Schedule List. Editing that list automatically updates the public schedule pages. It also emails and texts the competitors with the hearing schedule.
- Once a hearing has begun (or arbitration), set the Status of that decision to Hearing in Progress so the competitors know what the jury is working on. This gives them the ability to approximate the progress of the schedule and voluntarily be ready when their hearing is called.
- Once the hearing is complete, set the status to Hearing Complete even if the decision is not ready to publish. Again, it keeps the competitors informed. Once the Decision is rendered, setting the Status of that decision to either Publish Abstract or Publish Full Decision updates the public protest decision pages with either an abstract of the decision or the full decision.
- One of the panel members should be tasked with entering the On-The-Water Penalty information at the end of every day. Changes to the penalty list are automatically updated on the public penalities pages.
- One jury member should be assigned to make sure that all Questions to the Jury have a formal response. Answers posted are automatically updated on the public Jury Questions pages.

After the event.
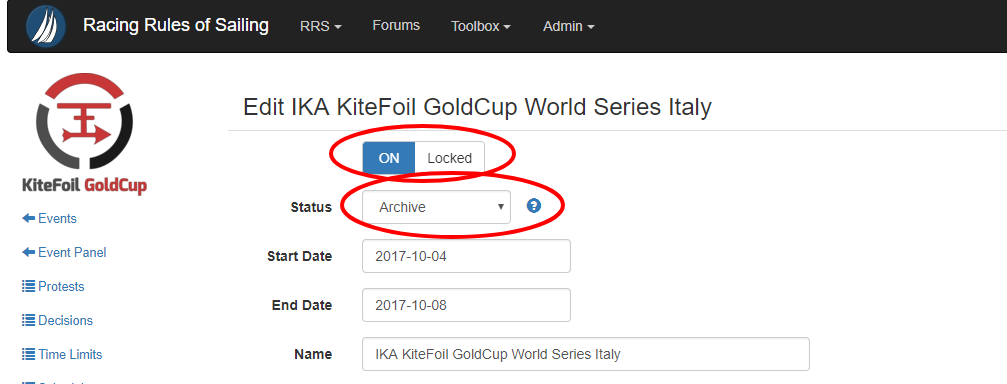
- The status of the Event should be changed to Archive. Once the status is not Active no further protests, scoring inquiries or other competitor inquiry is allowed. And when ready, the chief judge and/or whoever created the event should lock it so no further changes to the content by any of the officials can occur. There is an editing lock at the top of the Edit Event page. Simply set it to locked and no further editing will be allowed on any of the content.